Set Up Guide For Android
Last updated on September 23, 2024
How to install eSIM
These steps may differ depending on your device and language.
Important Notice
01
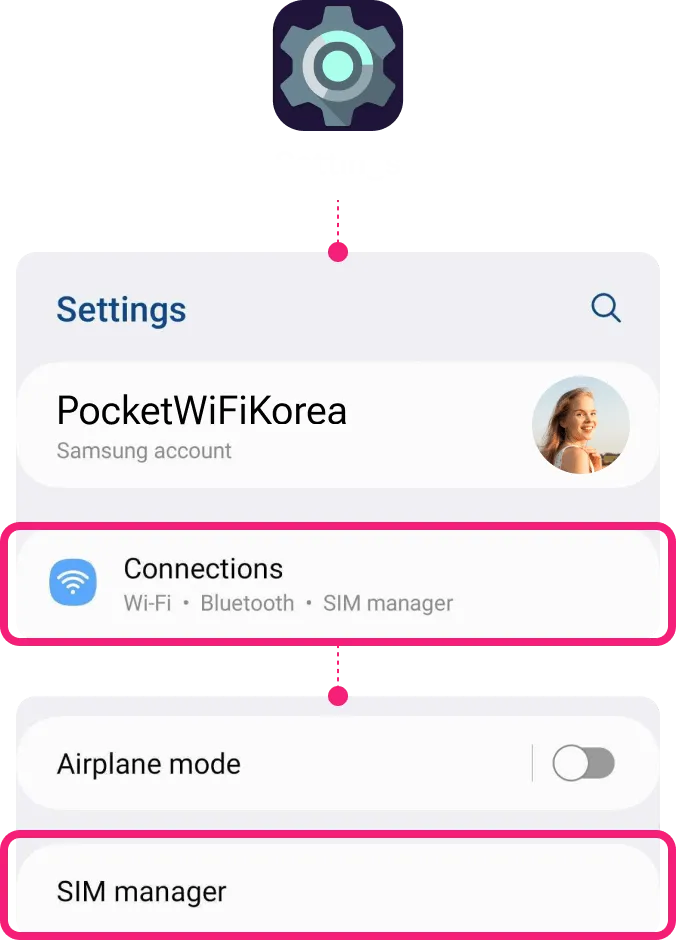
Add eSIM from the device’s Settings.
Go to Settings
Select [Connections]
Tap [SIM manager]
02
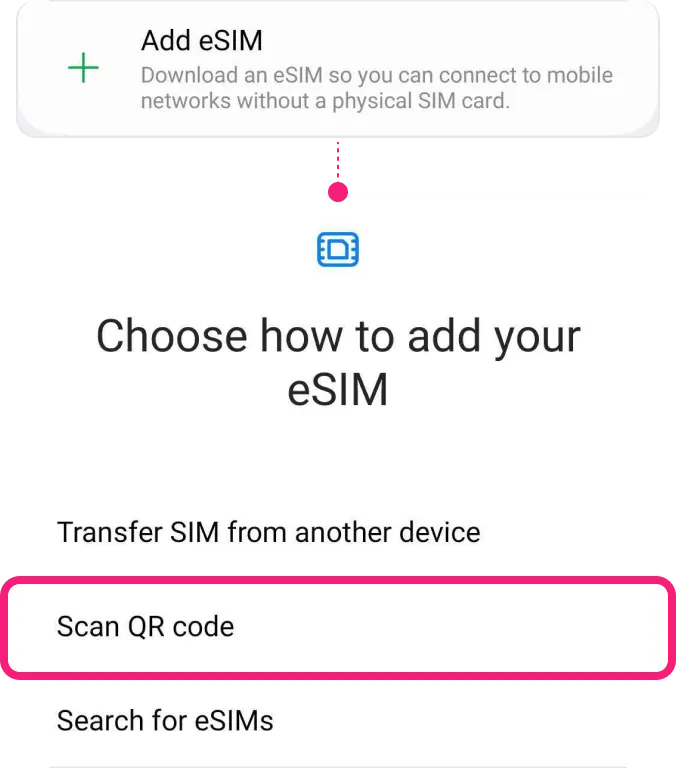
Select [Add eSIM] to install the eSIM.
Select [Add eSIM]
Tap [Scan QR Code]
03
Install eSIM via QR code or manual installation and wait for completion.
! Be connected to a strong WiFi to activate an eSIM successfully.
Either scan the QR code or manually put your eSIM details. You can find your eSIM details in the email.

04
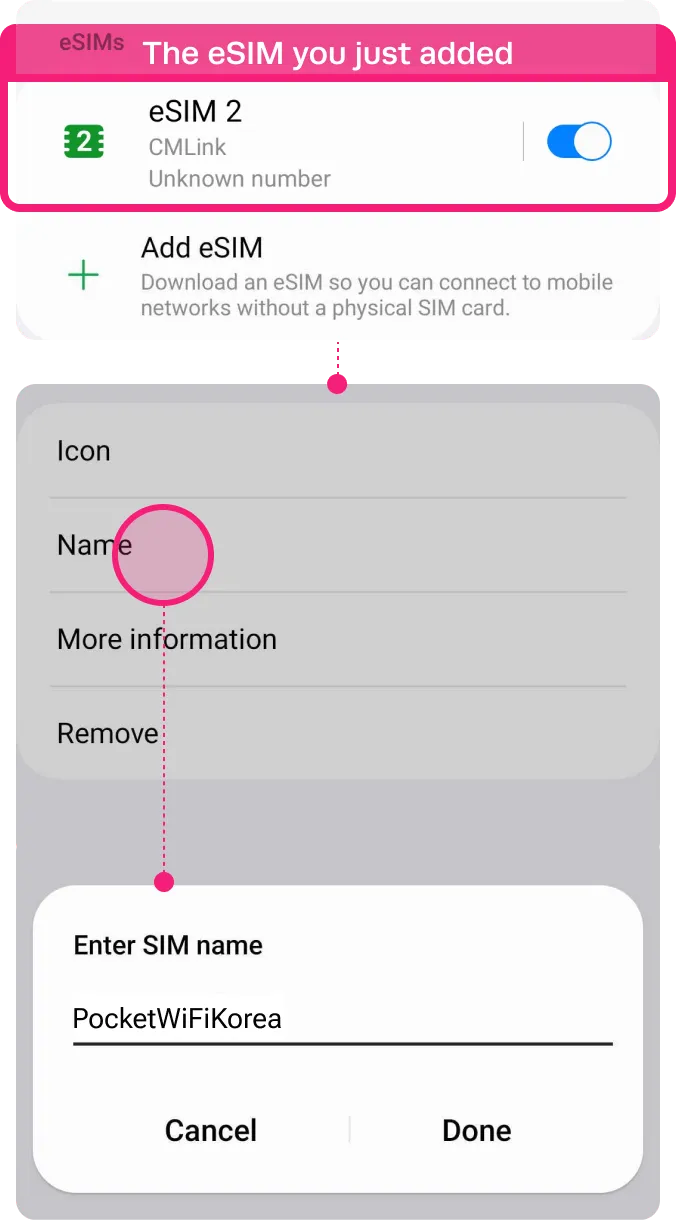
Label your eSIM.
After the successful installation, you can label it for more convenient management.
Go to Settings
Select [Connections]
Tap [SIM Managerl]
Choose the eSIM you just added
Tap [Name] and Type on new label of your own, e.g. {Destination} – eSIM World.
Installation Completed
The installation steps are done!
You are almost ready to use the data.
How to access data
These steps may differ depending on your device and language.
01
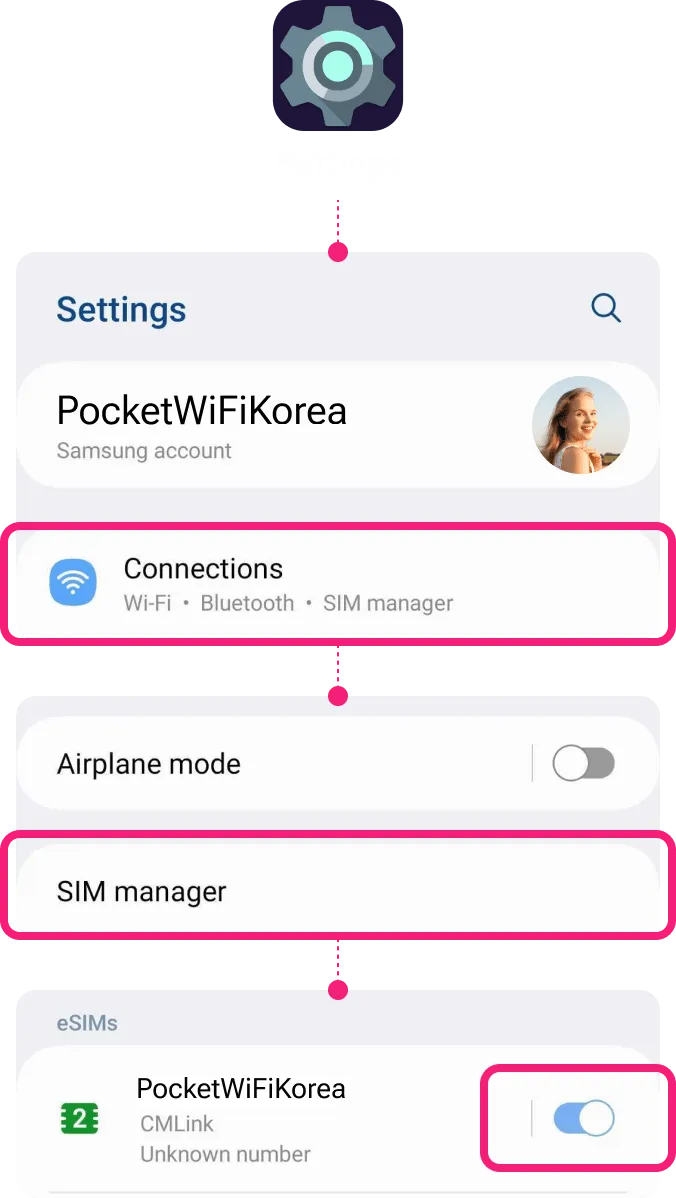
Turn on the eSIM.
Go to Settings
Select [Connections]
Tap [SIM Manager]
Toggle on your eSIM
02
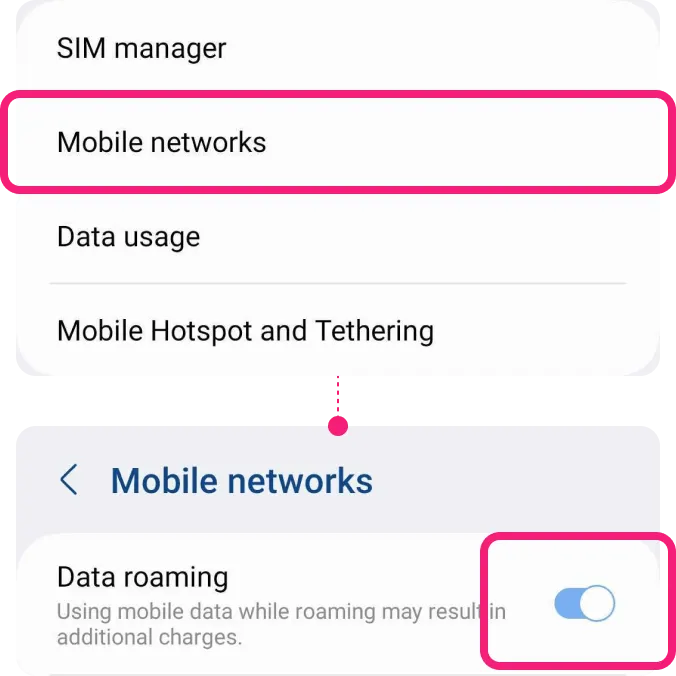
Turn on [Data Roaming] only for your eSIM.
Go to Settings
Select [Connections]
Tap [Mobile network]
Toggle on your ‘Data roaming‘
03
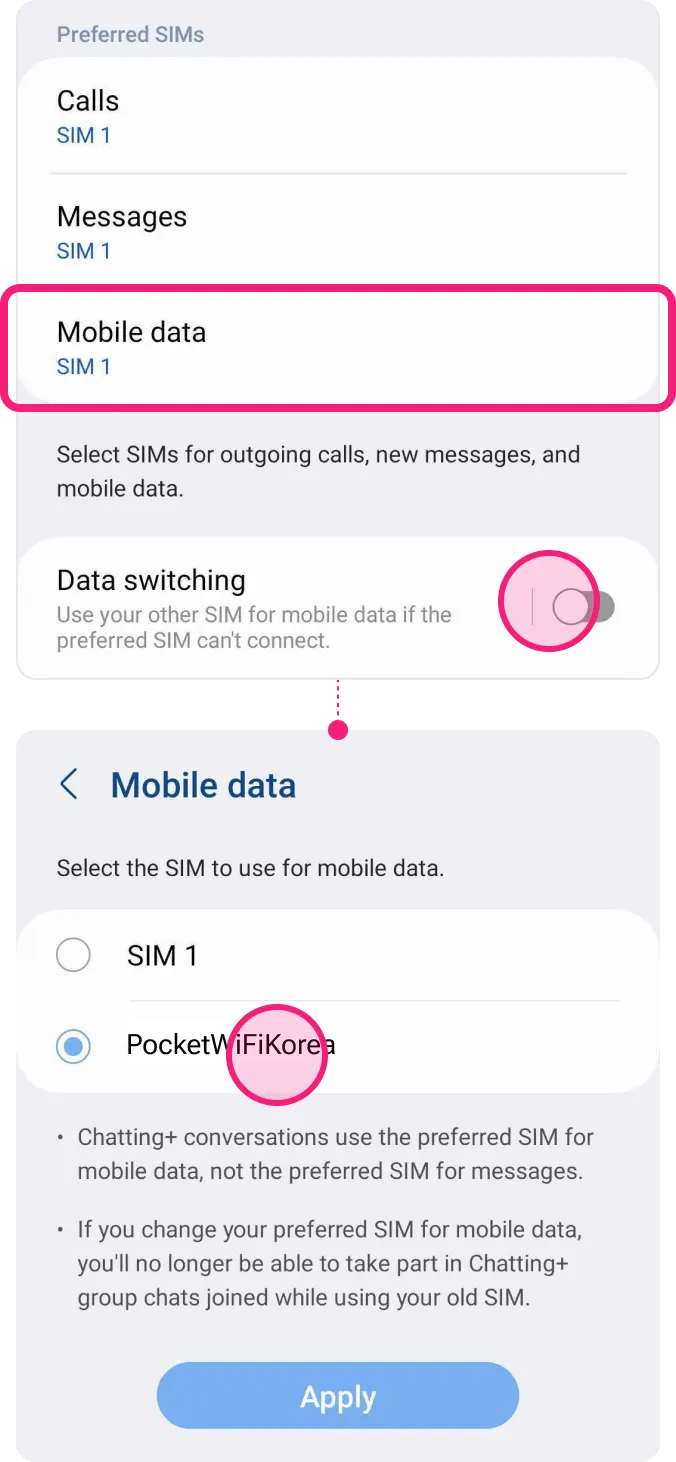
Select your eSIM on [Mobile data].
Go to Settings
Select [Connections]
Tap [SIM Manager]
Tap [Mobile data]
Select your eSIM
Please toggle off ‘Data switching’ to prevent unnecessary roaming charges from your domestic carrier.
Troubleshooting –
Still can’t access internet
If you installed the eSIM well, but cannot access the internet, please try the troubleshooting below. Also, please DO NOT remove the eSIM, since in most cases, our eSIM cannot be reinstalled or regenerated.
01
Manually perform Network Selection.
Check your plan’s Network: LG U+
Go to Settings
Select [Connections]
Choose [Mobile networks]
Tap [Select roaming network]
Tap on your eSIM in the bottom tab, and toggle off ‘Select automatically’.
When the list of networks is displayed, select the name of the telecom, LG U+

02
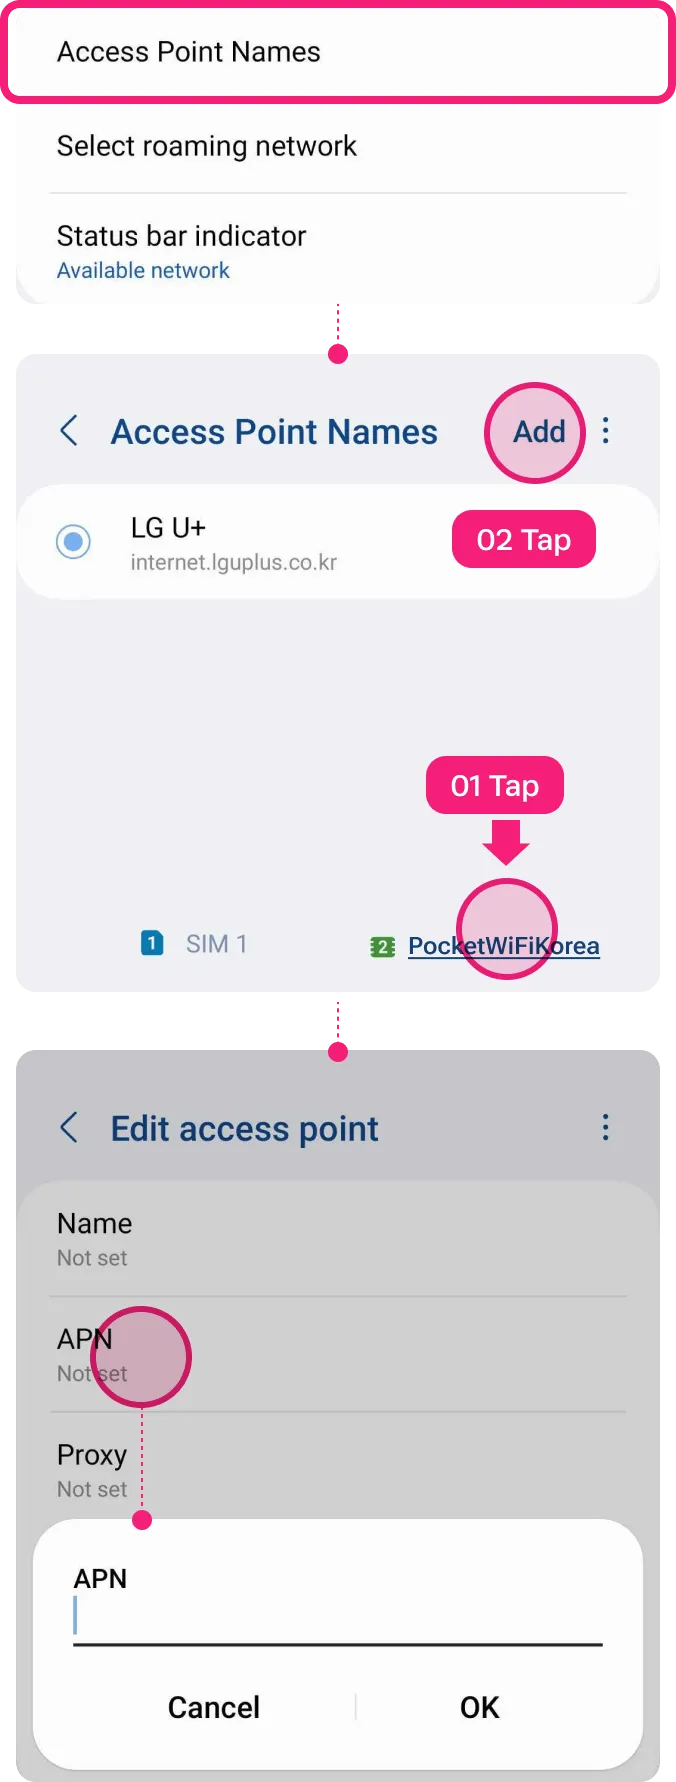
Set up APN manually if you have access.
Check your plan’s Network: LG U+
Go to Settings
Select [Connections]
Tap [Mobile Networks]
Choose [Access Point Names]
Try clicking on [Advanced] if it’s not visible.
Tap on your eSIM in the bottom tab.
Tap [Add]
Tap [APN]
Type the APN information and save.
Select the APN you just created
Restart the device
